Yachaq Robot
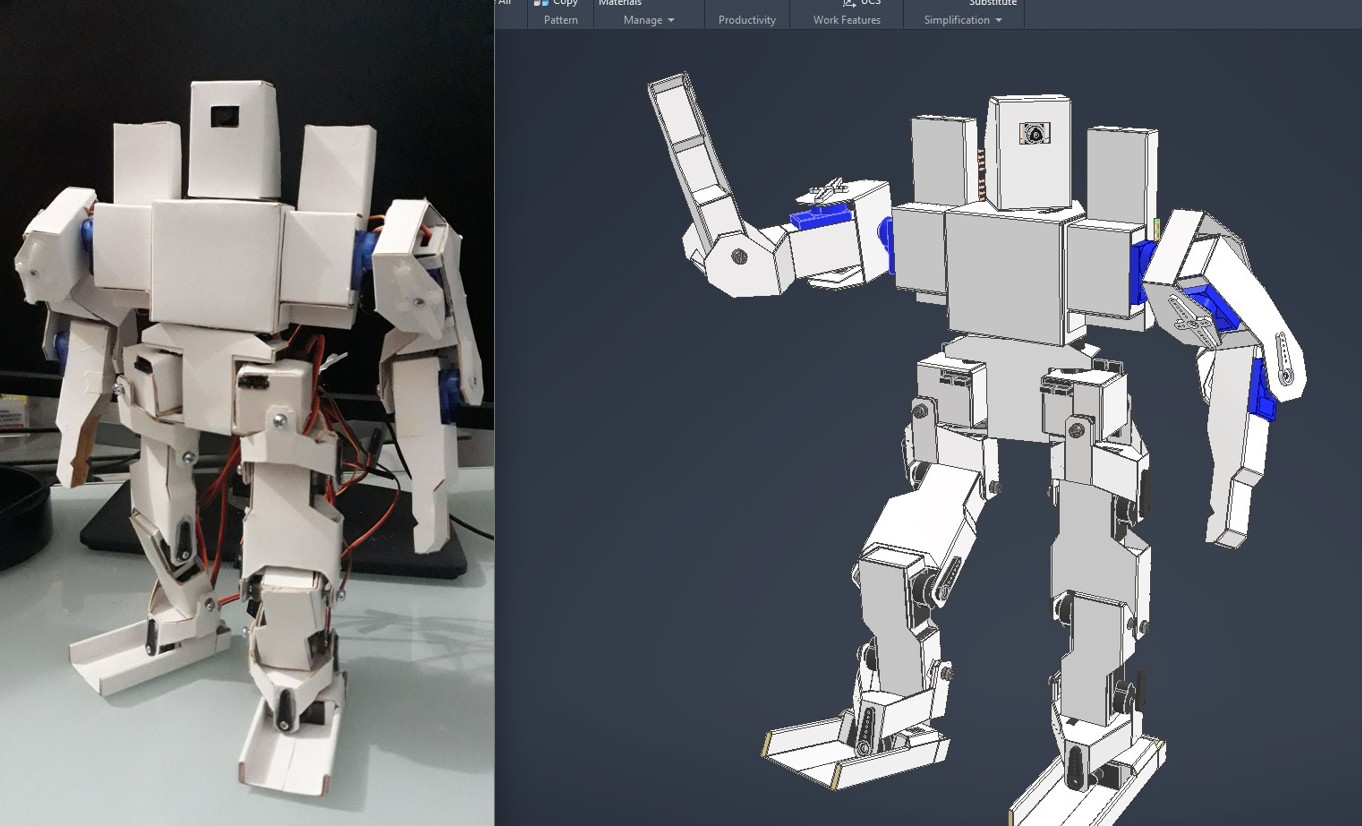
An open-source robotics initiative designed to democratize access to humanoid robotics knowledge.
Yachaq Robot is an initiative created in 2021 to give students with limited resources access to humanoid robotics technology so they could take part in the first national humanoid robotics contest, organized by the IEEE Robotics and Automation Society — Peru Section (RAS Peru), of which I was secretary at the time.
To achieve this, I built a mini humanoid robot using the cheapest and most widely available materials possible. The solution found for the material was unexpected: cardboard.
Objective
- Democratize access to humanoid robots for students and the general public.
- Achieve a functional, economical, and replicable design.
Impact
Yachaq has helped students across Peru learn about robotics and demonstrate their knowledge in national competitions such as the international conference INTERCON 2021.
As part of the preparatory activities for this conference, a group of 200 students took part in workshops where I showed them how to build their own Yachaq robots. These workshops were carried out in collaboration with RoboticsLab and the IEEE RAS Peru Section.
The project has also gained visibility in national media outlets in Peru.
Development
Since the initiative started from building a mini humanoid robot that could be compared with other robots taking part in competitions, the first step was to observe their characteristics as a point of reference.
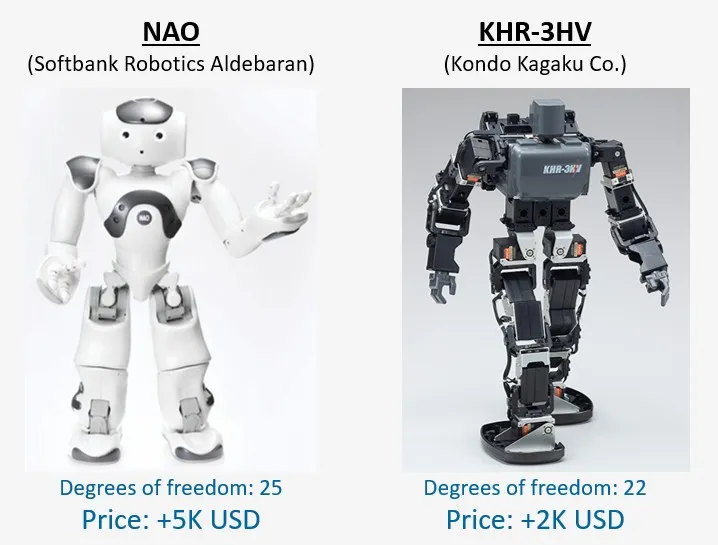
These robots have a cost that is out of reach for many students, who live in remote areas of Peru. That same remoteness means they have little availability of materials and equipment. I consulted students who wanted to take part in the contest and confirmed they had no access to a 3D printer or laser cutter.
Choosing the material
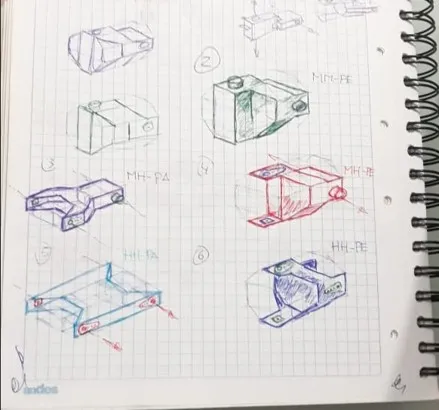
For this reason, the choice of material was restricted to simple stationery supplies and conventional hand tools. Thus, the first sketches explored the possibility of using cardboard as the structural material for the robot’s body.
Testing the material
To test the hypothesis that the material would be strong enough, I built a quick prototype to evaluate it, starting with the part that would bear the most mechanical load: the legs.
The goal at this stage was to get a first impression of the material’s behavior, before (or instead of) performing a computational mechanics analysis of cardboard as a nonlinear material. I opted for a more practical approach for this step.
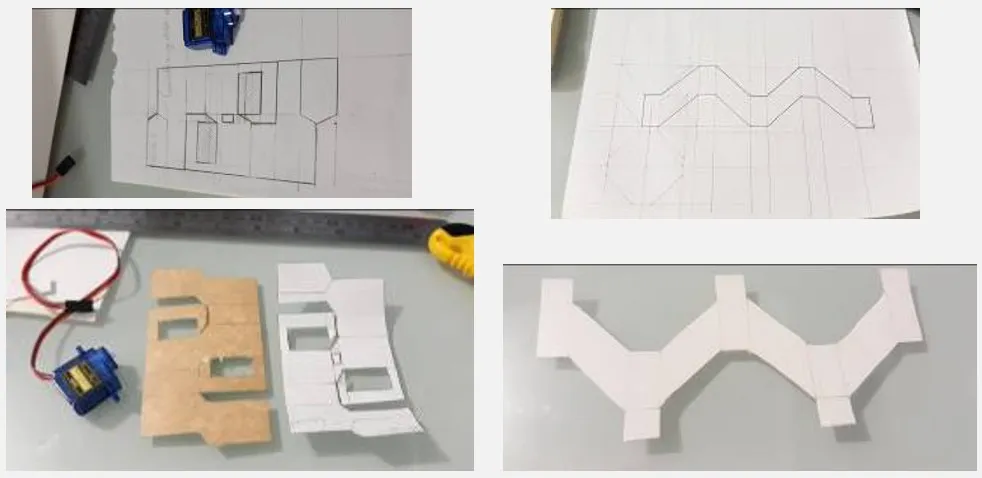
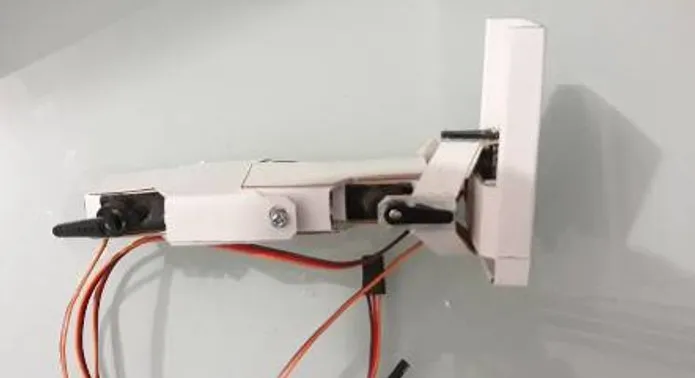
A few marks on the cardboard allowed me to create a simple folding pattern. To move the parts, I used SG90 micro servos because they are simple to control via PWM and highly affordable.
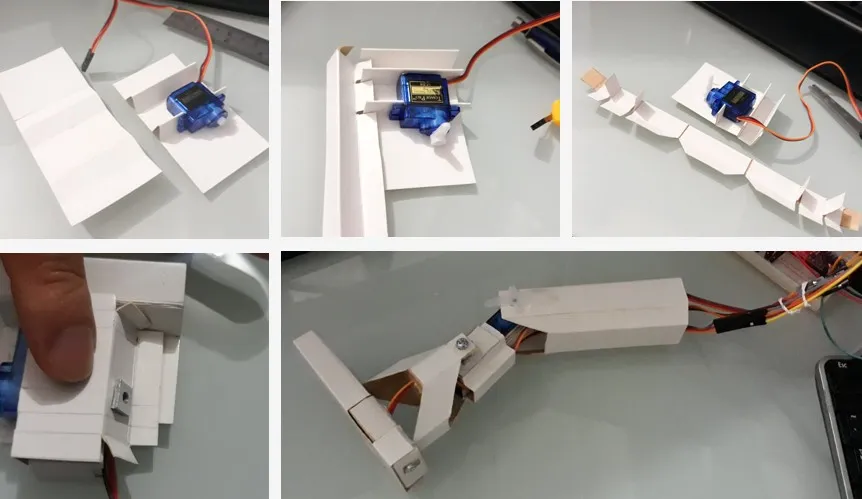
For this test, I completed the fabrication of a leg with 3 degrees of freedom. The folded cardboard provided enough mechanical strength to overcome the slight resistance to movement that I applied with my hands — enough to move a mini humanoid body of less than 500 g, my weight estimate at the time.
In this test I noticed that the foot required greater resistance to bending, so I reinforced it with popsicle sticks, elements that are also available and very inexpensive. In addition, the choice of material consequently led to the use of simple tools as well, such as scissors, pencils, wood glue, and hot silicone glue.
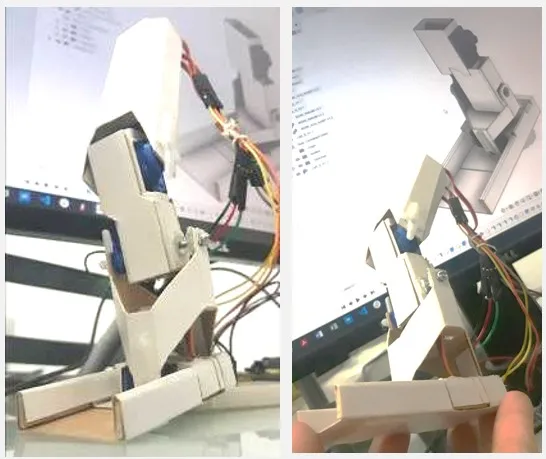
With this, I considered the material test successful. The next step was to design the rest of the robot’s body. Since the previous stage had confirmed what I already knew — that the mechanical strength of the material was strongly determined by the folding geometry — it was necessary to use design tools that would allow planning more complex folds.
CAD design
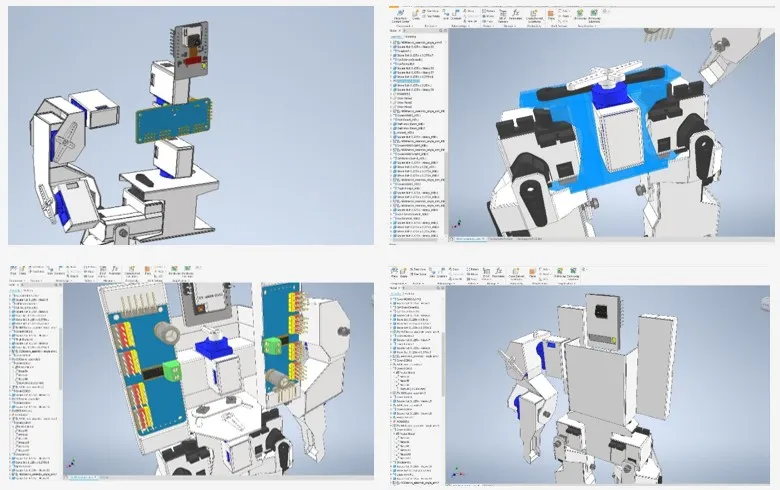
Since I had previous experience designing industrial equipment — much of it made of sheet steel and moving loads of several tons — I considered that designing bends in cardboard followed the same principle, albeit with much smaller loads. In this way I explored Fusion 360 and later Autodesk Inventor, with which I built the complete 3D model of the robot using sheet-metal design techniques.
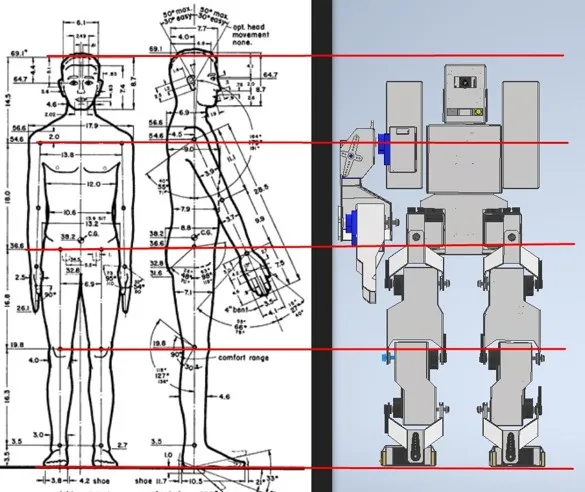
At this stage, I considered it important for the robot to keep human proportions, since this would make it feel more “natural.” Therefore, the lengths of the legs, arms, and torso follow proportions drawn from ergonomics guides.
The 3D modeling process was not merely conceptual and took several weeks; each limb and body part was designed to be buildable by folding cardboard. Each part of the model can be unfolded to obtain the cutting and folding template needed to build it.
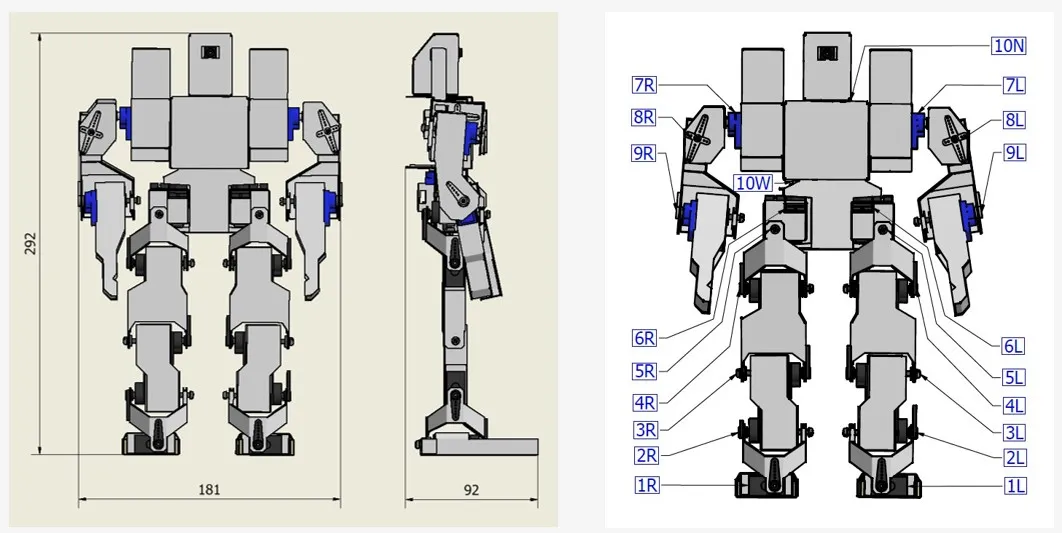
Cutting templates
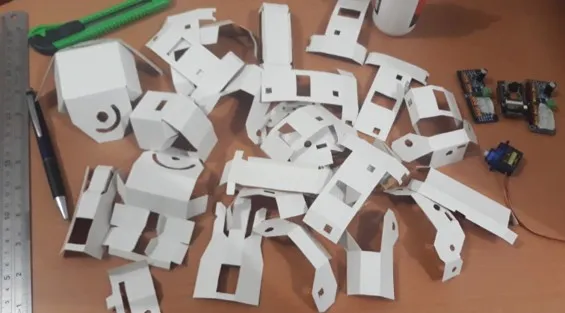
Once this design stage was complete, I obtained all the cutting and folding templates for the robot. At this point I could have done the cutting by laser; however, I preferred to carry out the process the same way students without access to this equipment would. So I cut each piece using simply scissors, with the goal of identifying manufacturability problems and documenting suggestions to make the process easier.
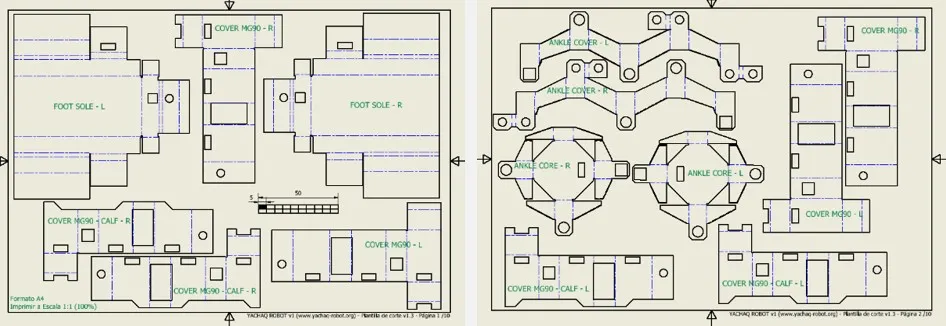
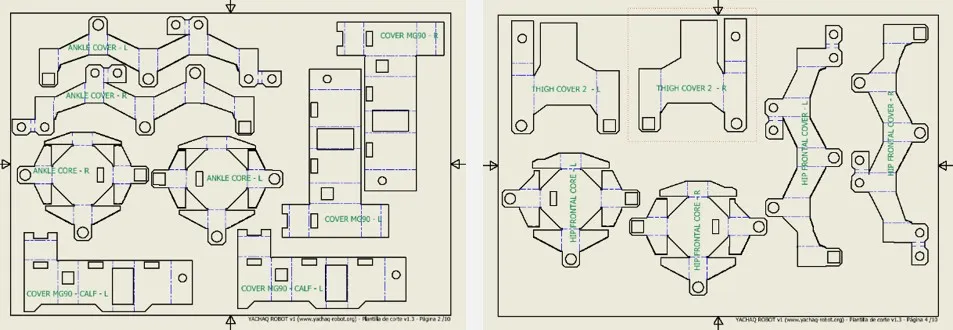
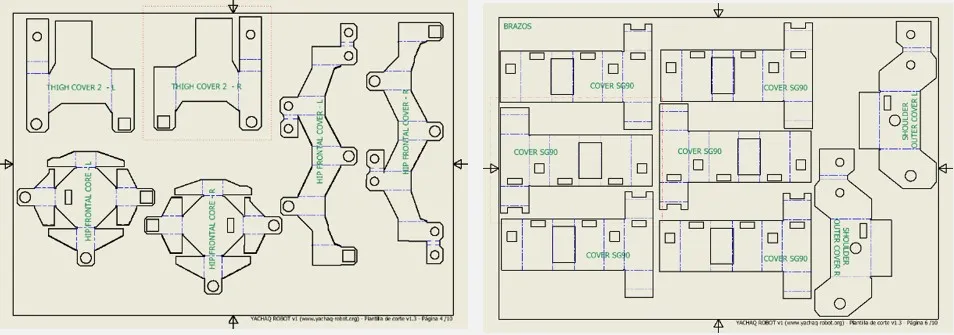
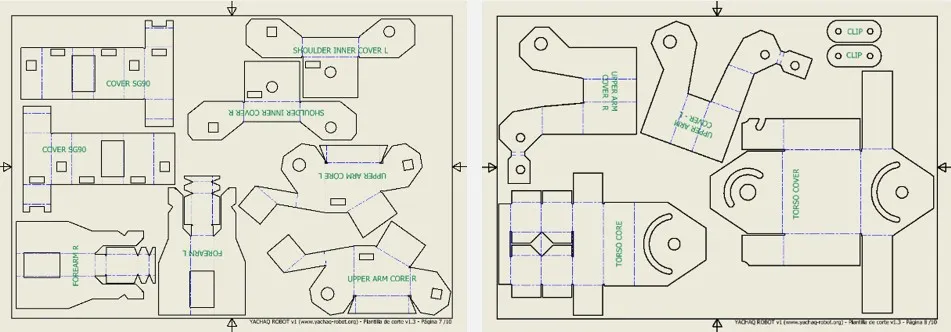
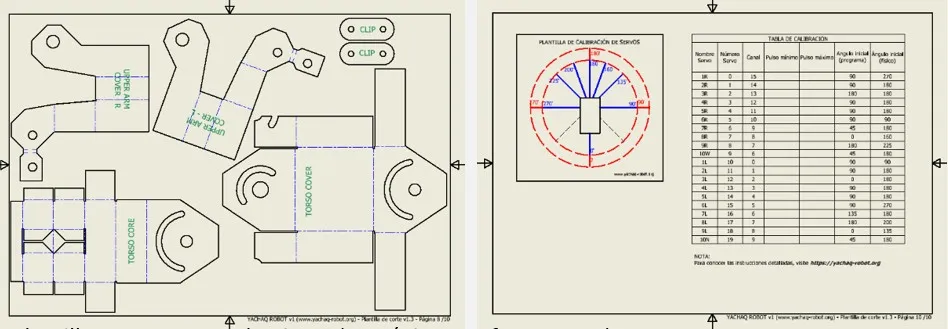
Cutting and folding templates for the robot’s parts.
The next step was to print the templates on conventional paper and glue them onto the cardboard, then cut out the shapes with scissors or a utility knife. Each limb had one or more cardboard parts that had to be joined with glue, and each limb contained one or two actuators inside. The actuators used were MG90S micro servos for the legs and SG90 for the arms, waist, and neck.
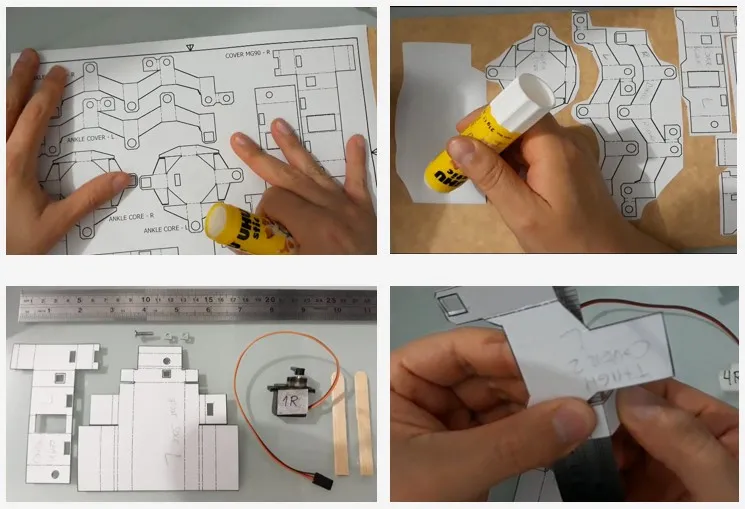
I documented the assembly process with photographs in order to later pass the instructions on to the students.
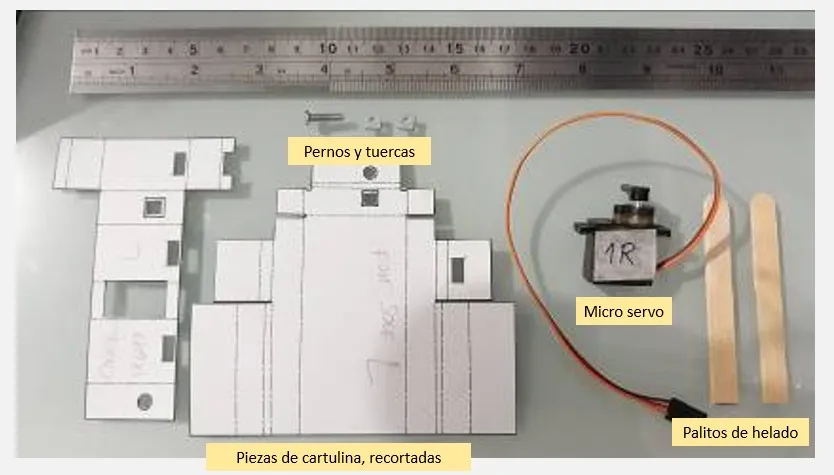
The process took several days given the number of pieces to assemble. However, it turned out to be quite useful for gathering recommendations for the students, as I had foreseen.
The robot took shape over the days. Here you can see the first leg.
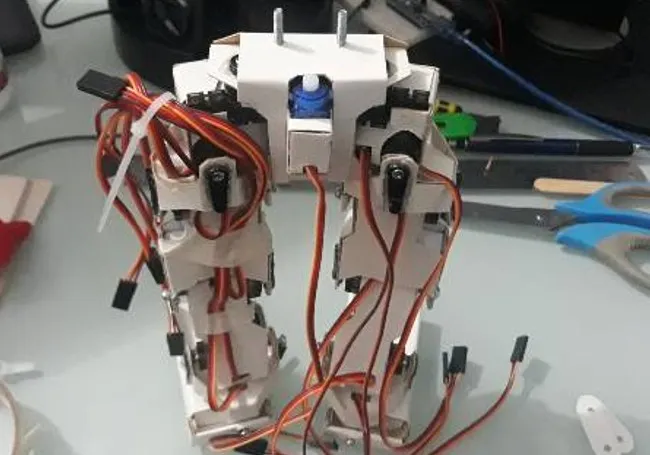
Then both legs and the hip, with the waist micro servo inserted. At the top you can see the retention bolts for upward vertical loads — bolts that allow holding the robot from the torso without damaging it.
At this point the decision to use human proportions made much more sense — the robot felt “humanoid.”
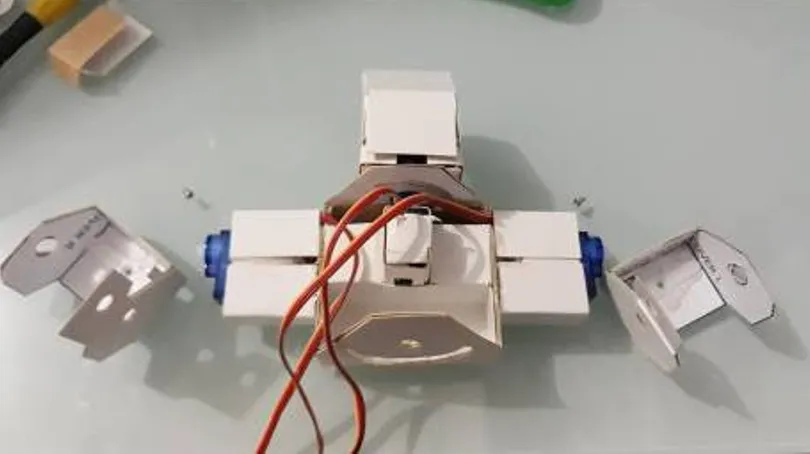
A similar process was followed for the torso: folding the cardboard pieces and inserting the micro servos into the robot’s body. In this image you can see the torso with the servo that moves the neck and the shoulders with their micro servos.
Wiring and control
Once the upper and lower parts were complete, I joined them and wired the servos to the PCA-9685 drivers, which carry the PWM signals to the micro servos.
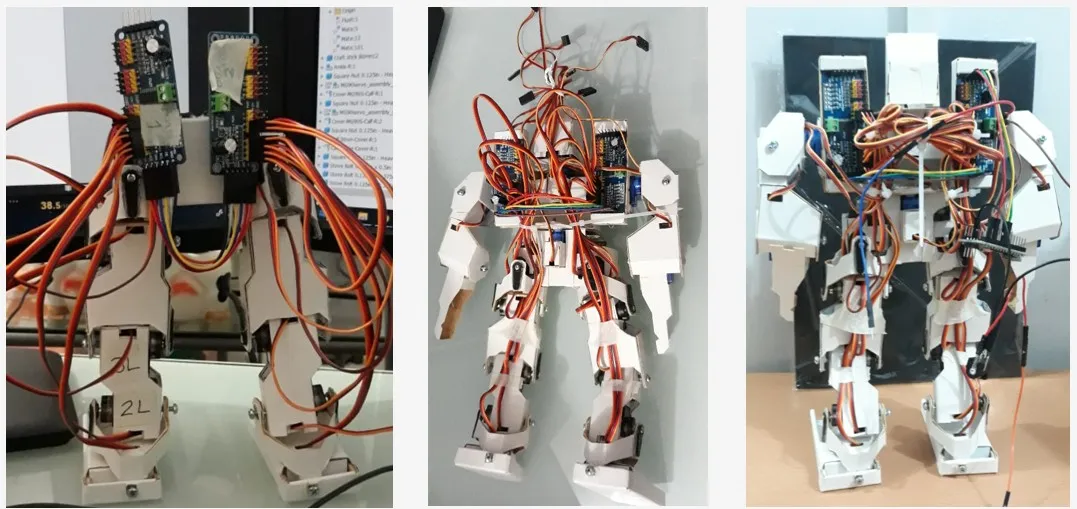
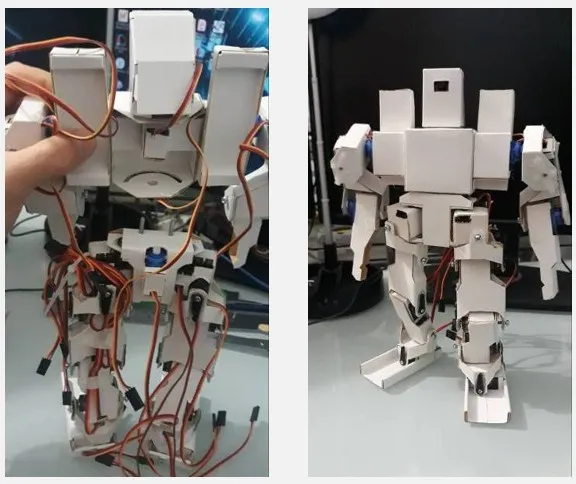
At this point, the first images of the complete robot already show the result of the hours and the design decisions taken.
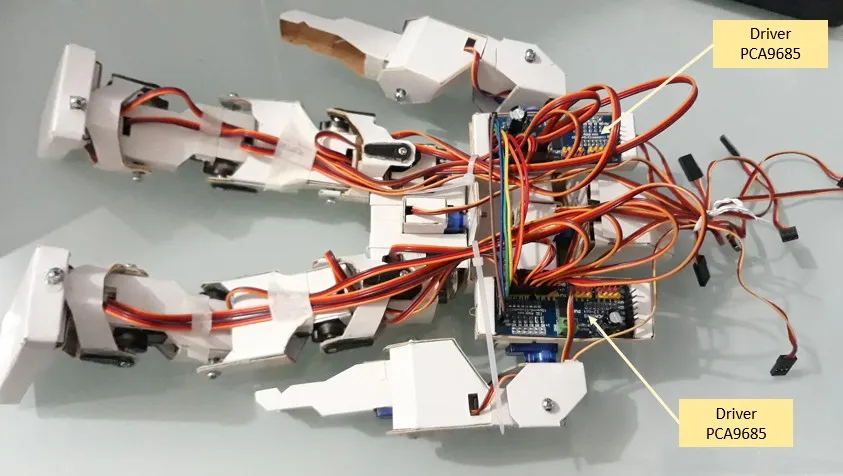
After the assembly process came the documentation stage. This is especially important, since one of the objectives was for the process to be replicable. I therefore created the physical wiring diagrams of the servos to the PCA9685 drivers.
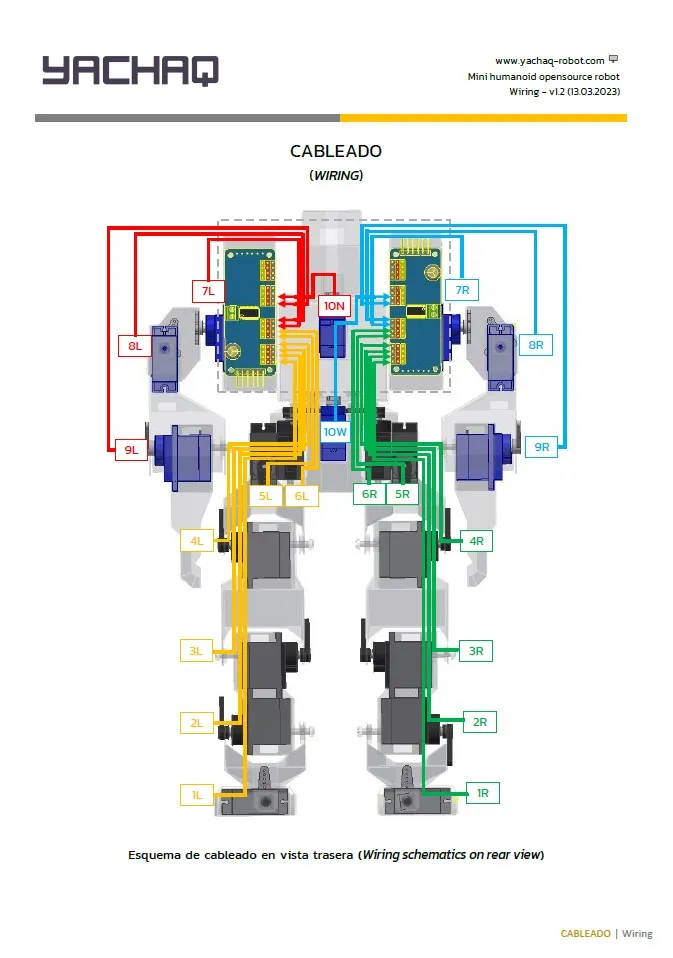
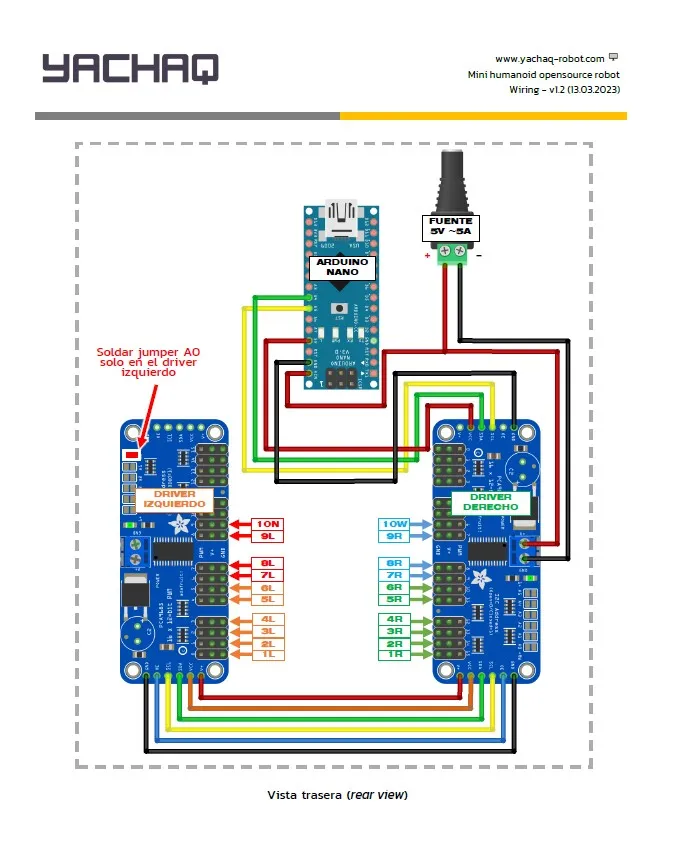
The documentation also included the connection diagram to the control board. In this first construction stage, the robot was controlled by an Arduino Nano, responsible for hosting the program with the robot’s basic movements.
First movements
Finally, the first tests were successful and the robot was able to make its first movements with quite acceptable precision, considering the robot’s objective and how inexpensive its components are. At this point in the project, the total cost of the materials was just under USD $100 — a quite accessible result considering the starting point.
Media
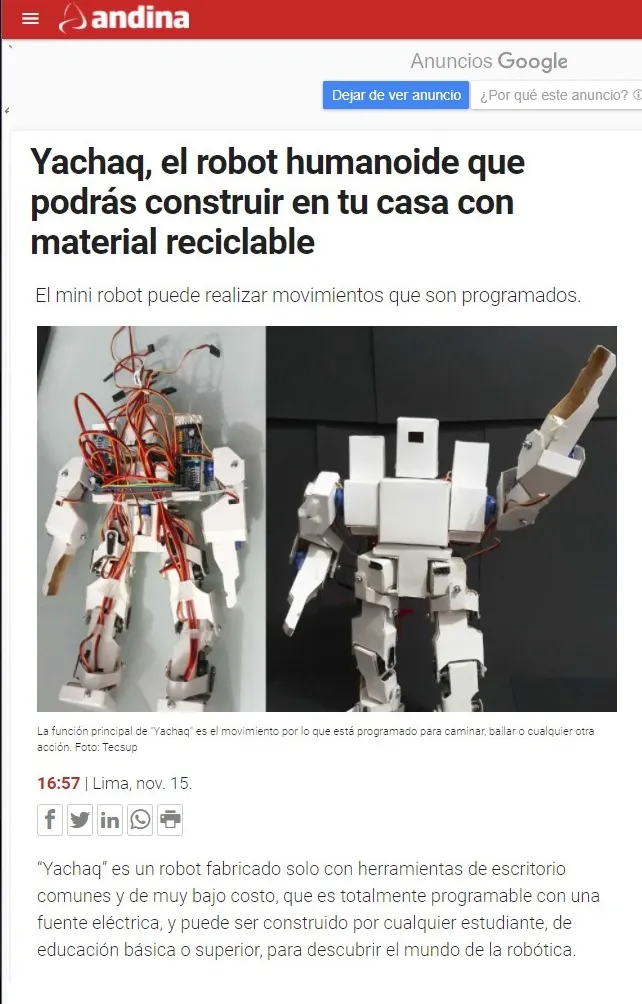
The Latin American news agency Andina wrote an article about Yachaq and highlighted the novelty of the material.
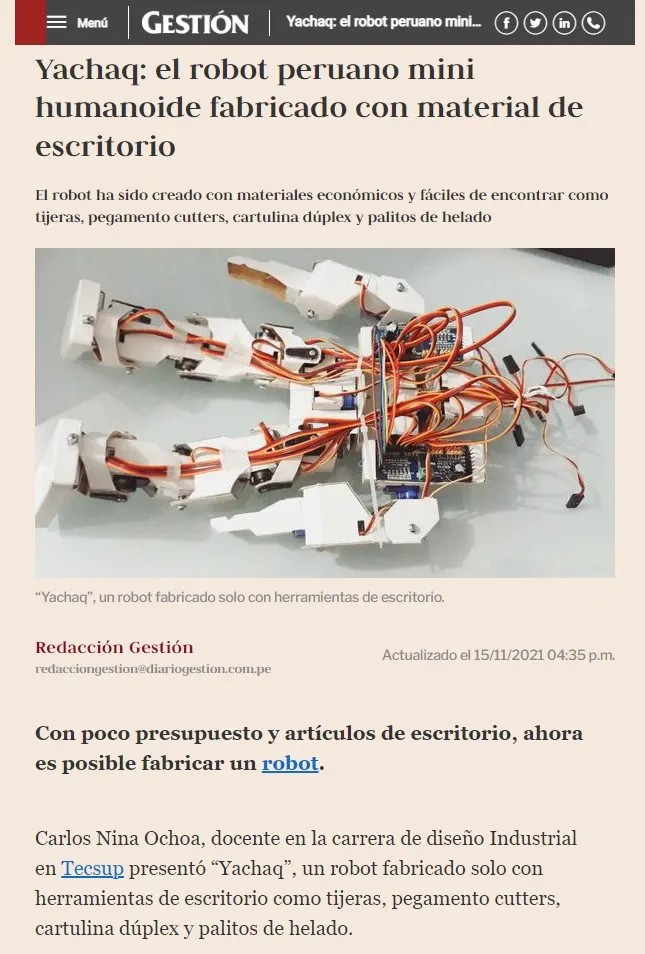
The Peruvian national newspaper Gestión, specialized in business, highlighted in its news article the use of simple tools in the manufacturing of the robot.
Conclusion
- The initiative achieved the goal of involving more students in learning humanoid robotics, through access to low-cost hardware and a design tailored to the particular constraints of the Peruvian environment.
- The development and dissemination of the innovation had positive results in the academic community and gained visibility in public opinion, sparking interest in humanoid robotics among more people since 2021.